Followers

Sunday, 9 November 2014


    I'm turning over a new snowflake. I do love winter, however I'm starting to feel like maybe it's for the wrong reasons. Previously winter kept me coming back because of the cookies and hot chocolate, the movies and wool blankets, and the absence of physical activity.
   This year may be the year I learn a lesson from other frozen countries and enjoy the outdoors. Maybe take in a coffee on a frozen patio, perhaps enjoy my sheepskin rug on the hammock, have a fire and roast a marshmallow, maybe even ski. Perhaps I require a full Elsa from Frozen costume so I can go sing from the mountaintops all while spinning and flailing in a glitter throwing frenzy.
   One thing I do love about winter is burning candles, and also, glitter. So I have combined the two to make these glorious and inexpensive yet fancy looking centrepiece candles.

 These are so easy, just lightly mist all the way around with spray adhesive, then sprinkle and roll whatever fine glitter you want. I used cream coloured candles and warm gold tones, also white candles with white glitter. It looks best if the candle and glitter kinda match. Before you get all fire department on me, I have tried this and neither the glue nor the glitter causes any flare ups in the flame (but of course you should always use proper safety when using candles and never leave them unattended). I hope you give it a try, everyone could use more glitter!

Friday, 7 November 2014


   If someone told you that you could abolish most of your chronic health problems for one teeny tiny price, you might think you are making a deal with the devil. All you have to do is never eat a doughnut, Big Mac, or really anything from a restaurant ever again.
   I'm talking about going gluten free and I did make the deal. Do I miss Big Macs or doughnuts? You better believe it. Would I ever go back? Hells to the No. All that being said, I made some delicious, chewy, crusty, almost fluffy french bread. All of you who partake in the fluffy dreamlike regular white bread should probably disregard this recipe, as you are probably too tired to make it.
   This was really great with hot cheese dip or in the place of crackers, and would make really great cheesy garlic bread or croutons. (Not suitable for sandwiches)

2 1/4 tsp     yeast
1 1/2 cups  rice flour
1 1/2 cups  tapioca flour
1 tsp           xanthan gum
1 1/2  tsp    salt
2 tsp           sugar
1 tbsp         psyllium fibre
1 1/4 cups  warm water
2 tbsp        melted butter
3                egg whites
1 tsp          vinegar

   Now leave behind any preconceived notion of what bread dough should look like and just accept the process. I put all dry ingredients including the yeast (because I was using quick rise yeast) in the stand mixer and mixed it up. Then put the psyllium fibre in with the water and let stand about 2 minutes. Then I add all wet into the dry and mix it on med-high speed for one minute. It will look like a sloppy mess, but you will pour it on a cookie sheet in two log shapes and then loosely form them with wet hands. It is better to try and get the shape you want as you pour, as it does really want to stick to your fingers. Turn on the oven to 400 and let your bread rise in a warm draft free place about 20 minutes. Pop in the oven about 40 minutes. Do not open the oven, or your bread may sink.


Here it is! In all of it's glory. It really stepped up my fancy dinner of stuffed mushrooms, hot cheese & herb dip, and chicken cordon bleu crepes. I love the chewy texture of this bread and it makes my house smell like it used to, like french bread. 


Wednesday, 5 November 2014

   What happened? Where did I go? It has been like a week! Short answer: I have been scheming.
It's Fall, I needed some new projects, food, style,  crafts, etc.
   I fell in love with the leek, now I see why it's called the king of onions. I really only made one dish, pasta with a creamy goat cheese sauce topped with garlic sautéed mushrooms and leeks, but it was so delicious I need to put leeks in everything! I really should have taken a picture.
   I finally ordered my long coveted sweater. I'm very sure that all of you have heard me talk about a particular hand-made in Vancouver, wool sweater, that just happens to have David Suzuki's face knitted into the back of it! You heard me, his face. I have been yackin' about it for more than a year, saving my pennies, dreaming… And in two more weeks, it will be in my grubby little hands.
You can check it out at http://www.grantedclothing.com/collections/cbc/products/david-suzuki-1
Or wait for my Blog post in two weeks…
 
   Halloween was a success, ran out of candy and not because I ate it! Had some really cute and enthusiastic trick or treaters although I was not able to scare any of them. Pretty sure I scared some adults with my black teeth though.
   Also caught the costuming bug, anyone in need of costuming services? I feel like I could make costumes for the rest of my life.

   If you are looking for a movie to go see, new out is 'St. Vincent' and it's really great, funny and touching. That's right, Bill Murray is touching. I recommend it, and also, buy the popcorn. It's worth it. (But don't buy the butter, it's not.)

   The most important discovery was home made Boursin style soft flavoured cheese. I could eat a whole lot of the stuff, indeed I do. So much so that I bought a large log from Costco and made some delicious variations! Recipe is not really needed. It's about
1/4 cup goat cheese
1 tsp olive oil
1/2 clove garlic
1/2 tsp oregano
Or you could use any type of spices you like!
In the one on the left, I added an oven roasted tomato, so good.

   Now, we prepare for Christmas! Hooray! (The most glittery holiday.) If I start now, I can probably glitter a lot of stuff...

Wednesday, 29 October 2014

It's happening again, I can't stop costuming. I think deep down I like the pressure. I feel as though I could make costumes all year long... Maybe I should.


   This pair (if you couldn't tell) is Wilma Flinstone and Betty Rubble and I'm pretty proud of it! I am super happy with the way they turned out and I hope they fit as great as I think they will.
      As I was sewing away, I was daydreaming of making the rest of the crew. How much fun would it be to pick out fabric for a Fred Flinstone? Anyone want to order early for next year? Then I might have an excuse to order foam in bulk, especially if there is going to be a Dino. (Is that even possible???)      
   Don't even get me started on other costume groups. I could finally have the group Banana costumes I have always thought essential. Just Imagine six or eight bananas crashing a party, hopefully on Halloween. Could I make a mascot that looks like a cartoon version of myself? New bucket list goal! Up there with 'carve my own wooden spoon', and 'grow a field of assorted pumpkin varieties'. I better get busy.

Monday, 27 October 2014

   Who loves giant hats? Lets have three cheers for giant hats. I say, lets give Winter those same three cheers.
   Now hear me out. Without winter, giant hats would be out of a job. Giant mitts would have to find work as Chihuahua beds. Wool would be unnecessary and hot chocolate would be less desirable. Ok, maybe not that bit about hot chocolate. The point is the mitts that go over top of my mitts would waste away. I think my cat Stan would be pleased with this arrangement, as he will actively avoid me if they are nearby. I can't say I blame him, I think they are larger than he is.

   I think there are ways to enjoy Winter. I feel I should document this now, as I feel I will need a reminder in a couple months. For starters, there is an endless list of soups and stews, my favourite being cream of mushroom, cream of celery, cream of chicken, potato… you get the idea. Then there's the baked everything, buns, pies, cookies, meats. I'm sure it's just an excuse to turn on the oven.
   Moving on from assorted foods, let's not forget skating, tobogganing, snow forts, snow balls, winter picnics, ice sculptures, perfectly chilled beverages, holiday candy making, and I will even include cross country skiing (preferably en route to a  warmish picnic).
   For all of you who do not have winter boots or possible have been duped into buying 'winter' boots made in a gloriously warm climate, go out right now and get some warm and stylish boots.  It will take some digging, but they are out there. Once you find them your experience of winter will change. (Why is it that we insist on children wearing nice warm footwear yet we deny ourselves the magnificent pleasure of warm, dry feet on a cold wet day?)

   In some strange way, simply enduring the weather, then complaining about it is somehow satisfying. How cold will it get this year? How much snow will I shovel? Will the snow pile be taller than the garage again? Will my vehicles emergency kit remain untouched? Let's hope so. Will all Canadians be issued a card that exempts them from the social pressures of not wearing furs? I'm pretty sure it is fact, I just haven't received my card yet.

Saturday, 25 October 2014


   Mission: Real Red Velvet Cake!
   Ya herd me, Real red velvet cake, let me explain. Most of you have been led to believe that red velvet cake is chocolate cake with a container of red coloured goop food colouring added to it, to make it extra delicious I suppose. Don't get me wrong, I'm not against food colouring, I'm just not sure where along the line it became so delectable. After all it doesn't really taste.
   Well let me tell you of a story involving a cousin of the carrot cake, a chocolate cake made with beets.  Sounds weird, I know, but this is real red velvet cake. Today I made some for the first time (after a lengthy wait due to procrastination and lack of beets) and let me tell you, it was delicious. I have to admit though that somehow it was less red than the fake red velvet cake, and I'm alright with that.

   I bet you want the recipe. I used one from a magazine as inspiration but I can never really follow a recipe… (I just chose not to.)

2 cups   Gluten free flour mix
1 cup     cocoa
2 tsp      baking powder
1tsp       baking soda
1/2 tsp   salt
2 cups   beet puree- (Roast, peel, and pulverize in food processor.)
1 1/2     cups sugar
1 cup    melted butter
1/2 cup  plain yogurt
1 tsp     vinegar
2 tsp     vanilla
4           eggs
1 tbsp    psyllium fibre (Bulk Barn carries this stuff, it holds the cake together)

   Pre-heat oven to 350F and butter your tins. Sift all dry ingredients together, cocoa and baking soda are always lumpy. In a mixer, combine beet puree, sugar, butter, yogurt, vinegar, vanilla and psyllium fibre. Let stand for about 3 min. Then add dry ingredients and mix, pour into pans and bake. I used 3 smaller round ones and baked for about thirty minutes. You should probably let them cool, I could have waited longer, my icing is kinda melty...
Here is the giant beet Eric gave us, from his garden.


Here is the beets after roasting and pulverizing.
And here are the baked cakes! So tasty and moist!

Friday, 24 October 2014

   When you are crafty like me Halloween can be a busy time. Often some poor soul comes a knocking, looking for me to create a magical themed costume for two, in less than a week, for no more than eternal gratefulness. I know it's hard to imagine, but this is not always possible. The poor soul customarily leaves with an amazingly executed, guise attaining, borrowed costume that did in fact take months to make (last year) and cost about two months worth of groceries.
 

This year something happened. Someone needed my help and I was able to produce!


   I think they turned out first rate. I was only in charge of the headwear, thankfully, or I may not have agreed. This project will eat half a day, if you are like me and have most of the small supplies on hand already, and have a sewing machine all set up and prepared to sew. If you do not have these luxuries, prepare to order pizza for dinner because you'll be here all day. In the event you would like to proceed anyhow and recreate these cherished 'Minion' toques, I'm including a tutorial with lots of pictures.
Start with a trip to the fabric store for some yellow fleece. I bought 1/2 a metre. Then make a rectangle that wraps all the way around your head but not too tight. Sew up a simple toque with a nice rounded top. I then used an awl (pointy stabber thingy) to start some holes for the bits of pipe cleaner to go through. You want to cut the pipe cleaners twice as long as you want the hair, and poke both pointy ends through to the top of the hat (so there are no sharp ends poking your head). 
Now comes the part where we dig through the kitchen to find some canning jar rings in different sizes, hopefully silver coloured. As you can see from the pictures, it's starting to look hopeful already!

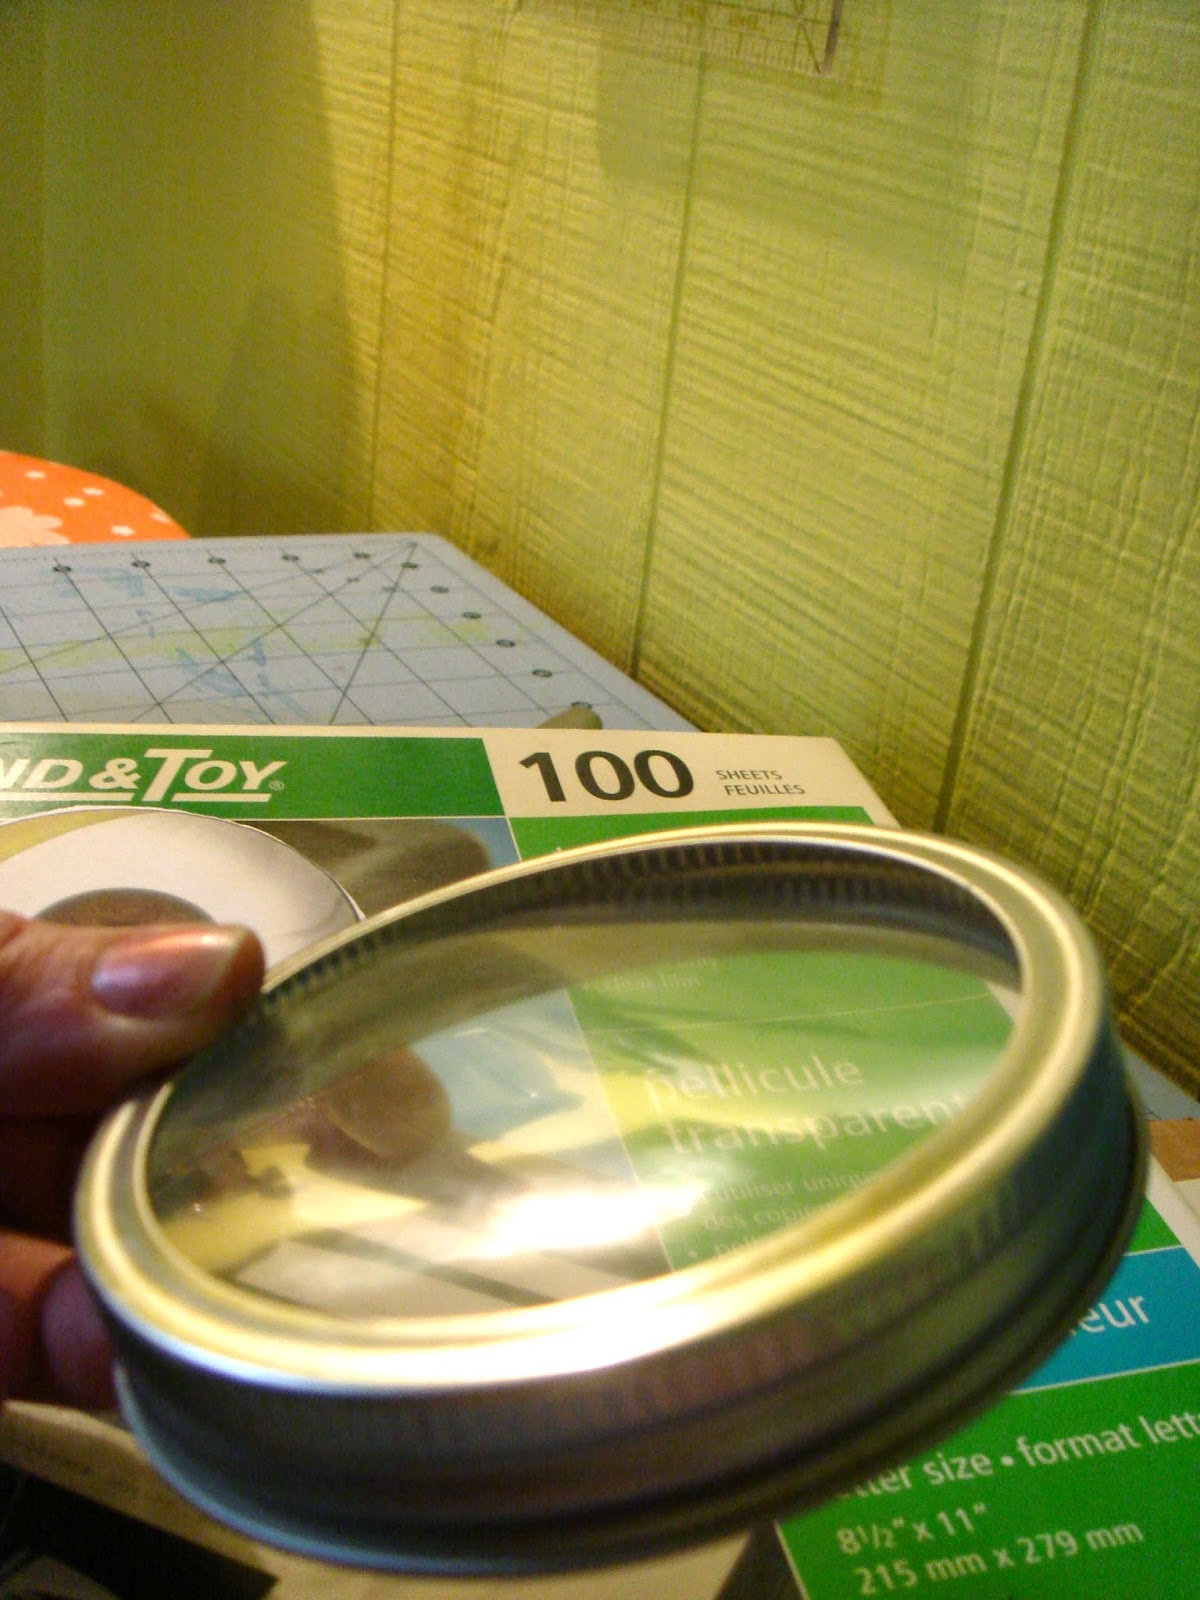
Here I acquired some enlarged minion eyeballs, printed them out, glued them to cardboard (I used spray adhesive), and trimmed them so they fit just snug inside the lower edge of the canning ring. Do not glue them in until you add some 'lenses' to the goggles with transparencies (you could repurpose a strawberry or muffin plastic clamshell type container instead). Just some dabs of super glue on the top inside edge to glue in the lens, and then snugly fit in the cardboard backing eye, adding a few more dabs of superglue to keep it in place. Looking good! All it needs now is a band!
   I whipped up the band on the sewing machine out of some black sweatshirt type material and sewed some  extra yellow tabs that are to be glued to the back of the eye for extra durability, while the ends of the black bands are glued to the side of the goggle for style. I used Gorilla Glue epoxy that dries crystal clear, some elastics to keep it all in place while drying, and a book to weigh it down so the back tabs glue properly (as you can see from the photos). To add it to the toque, I simply tacked it with a few hand stitches in three places so the goggles can be easily removed if you need to wash the hat.


And that is all you need! 
Ok, maybe not. 
You do need the rest of the outfit, but now your halfway there!